How to Separate Hops from Wort
The Ultimate Guide to Hop Spider
Using a hop bag is an entry-level, easy way. However, the Hop Spider is a much more efficient and convenient option than a hop bag. It allows for better hop utilization, as the hops have more room to move around. It is also easier to clean and can be reused multiple times. Additionally, Hop Spider can be used with whole hops, while hop bags are typically used with pellet hops.
As a homebrewer who has passed through the primary stage, you must be full of curiosity about Hop Spider In this article, I’ll help you learn and use Hop Spider in depth to ensure a smooth brewing day.
What is a Hop Spider?
Hop spider, also called hop filter, hopper or kettle spider, is essentially a stainless steel mesh basket that can be filled with hops and then placed in the brew kettle during the boiling process. As the wort boils, the hops are contained within the hop spider, preventing them from scattering throughout the kettle and clogging the equipment.

They don’t look like spiders. So what is the origin of this name?
Why is it called a Hop Spider?
The name sounds a little weird, doesn’t it?
In fact, the hop spider started out as a metal frame with a large nylon bag and three arms attached, which perches over the kettle. These arms look like the legs of a spider, and the hops inside the mesh bag resembling the spider’s body.
It looks like this:

Why Use a Hop Spider?
Using a hop spider ensures a more efficient and convenient brewing experience.
Firstly, it helps to contain the hops, preventing them from dispersing throughout the kettle and making cleanup easier.
Secondly, it aids in the extraction of hop flavor and aroma by keeping the hops contained in one place.
Lastly, a hop spider can reduce the risk of clogging in your equipment, such as pumps and valves, by trapping hop debris.

Hop Spider Benefits
- They are made of 304 stainless steel, ensuring that they are both clean and durable.
- Since the alluring bitterness and flavor of beer comes from isomerized acids found in hops, a hop spider can assist you in removing hops at any point during the brewing process to help control the amount of alpha acids that transform into isomerized acids, which in turn helps to achieve the desired beer flavor more easily.
- The hop spider makes it easier to remove the hops from the wort after the boiling process, minimizing the chances of residue left in the kettle.
- Hop spiders are versatile and can accommodate different types of hops, such as whole-leaf, pellet, and hop cones. This flexibility allows for greater experimentation and customization in the brewing process, ensuring the desired flavor and aroma profiles are achieved.
- A hop spider greatly reduces the risk of clogging in your tubing, chillers, pumps, and drainage system. Using a hop spider can save you time, money, and frustration in the long run. Additionally, it promotes a more efficient and effective brewing process.
Hop Spider Drawbacks
There’s a flip side to every coin, and hop spiders are no exception.
Many homebrewers believe that using a bag or hop spider to add hops can reduce the hop utilisation by around 10%, leading to a lower bitterness level in the beer than intended. This is because the bag or spider can limit the hops’ contact area with the boiling wort, reducing the amount of isomerised acids dissolved in the wort. It is important to consider this when calculating hop contributions to ensure a balanced beer.
Nonetheless, this reduction in hop utilization can be compensated for by adding more hops, extending the boiling time, or periodically agitating the hops in the spider.
Or, there is an ultimate solution: use a Large Hop Spider.

It is also called Super Hop Filter Basket, Stainless Mesh Bag or Brewing Basket. While using this filter basket you can add hops directly to your kettle for maximum wort exposure.
The 12″ or so diameter will fit most 10-gallon or larger kettles. It’s also wide enough that most immersion chillers can rest inside the basket during chilling.
The Large Brewing Basket can be used not only for filtering homemade beer, but also for homemade wine, homemade coffee or composted tea. It’s easier to use than a mesh bag because it sinks to the bottom of the keg without weighing it with anything.
How to Use a Hop Spider?
Step 1: Choose the Right Hop Spider
There are many different hop spiders on the market, so it’s important to choose one that will work best for your setup. Look for a hop spider that is large enough to hold your desired amount of hops, but small enough to fit into your brew kettle.

Step 2: Add Your Hops
Once you have your hop spider, it’s time to add your hops. Measure out the amount of hops you need for your recipe and add them to the hop spider. Be sure not to overload the hop spider, as this can cause it to overflow and defeat the purpose of using it.
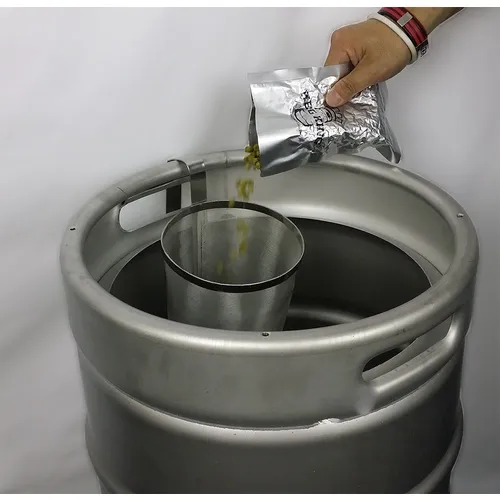
Image Source: morebeer.com
Step 3: Add the Hop Spider to Your Brew Kettle
With your hops safely contained in the hop spider, it’s time to add it to your brew kettle. Simply place the hop spider into the kettle, making sure it’s submerged in the wort.
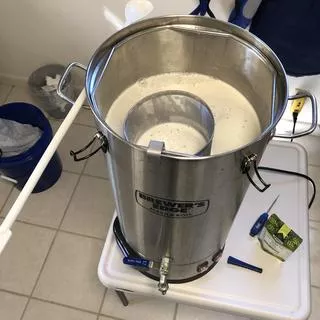
Image Source: morebeer.com
Step 4: Boil as Usual
Now that your hop spider is in place, you can proceed with your brew day as usual. Boil your wort, adding any additional hops at the appropriate time.
Step 5: Remove the Hop Spider
Once your boil is complete, it’s time to remove the hop spider from your brew kettle. Be sure to handle the hop spider carefully, as it will be hot from the boiling wort. Dump the spent hops from the hop spider and clean it thoroughly for your next use.
How to clean a Hop Spider?
Cleaning a hop spider is essential to maintain its effectiveness and prevent any potential contamination in your brewing process. Here’s a step-by-step guide on how to clean a hop spider:
- After use, remove any leftover hop residue or debris from the hop spider. You can gently tap it against a trash bin or use a soft brush to loosen and remove the particles.
- Rinse the hop spider under running water to remove any remaining hop oils and residue. Pay attention to the mesh and ensure that it is thoroughly rinsed.
- Prepare a cleaning solution by mixing warm water with a mild detergent or brewing-specific cleaning agent. Follow the manufacturer’s instructions for the appropriate dilution ratio.
- Submerge the hop spider in the cleaning solution and let it soak for a recommended period of time, typically 15-30 minutes.
- Use a soft brush or sponge to gently scrub the hop spider, paying close attention to the mesh and any hard-to-reach areas.
- Rinse the hop spider thoroughly with clean water to remove any soap or cleaning solution residue.
- Inspect the hop spider for any remaining debris or stains. If necessary, repeat the cleaning process or spot clean specific areas as needed.
- After cleaning, sanitize the hop spider using a brewing-approved sanitizer. Follow the sanitizer’s instructions for the appropriate contact time and dilution ratio.
- Rinse the hop spider one final time with clean water to remove any sanitizer residue.
- Allow the hop spider to air dry completely before storing it in a clean and dry location.
A good tip is to use a spray nozzle on your hose to make the cleaning process easier.
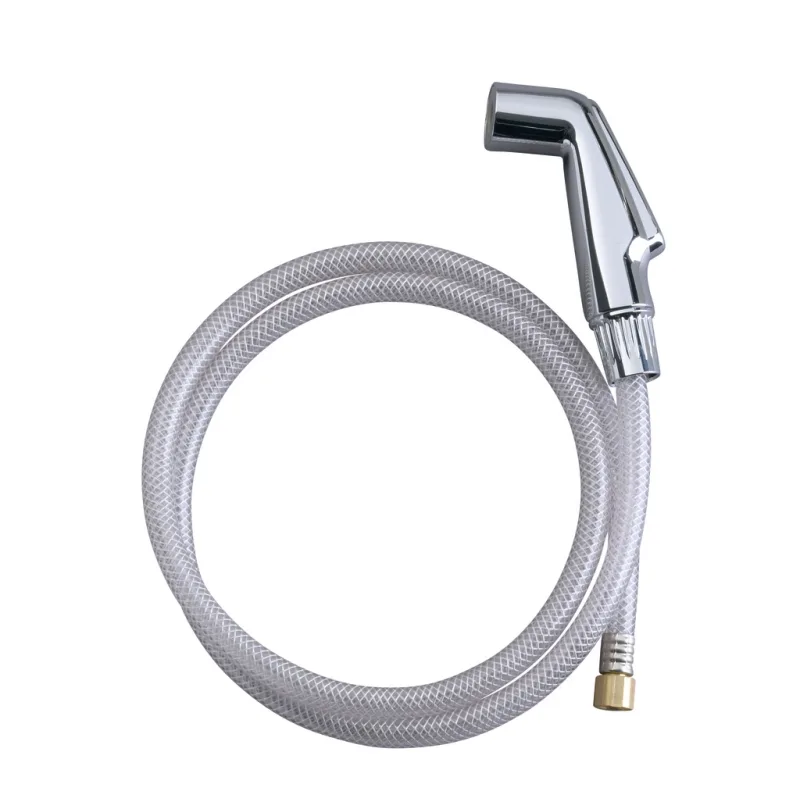
The sprayer on the faucet (Image Source: amazon.com)
By following these steps, you can effectively clean your hop spider and ensure its longevity and optimal performance for future brewing sessions.
How to choose a Hop Spider?
When it comes to choosing a hop spider, there are a few factors to consider to ensure you select the right one for your brewing needs. Here’s a step-by-step guide on how to choose a hop spider:
- Size: Consider the size of your brewing equipment and the amount of hops you typically use. Choose a hop spider that can accommodate the volume of hops you typically work with. It should fit comfortably in your brew kettle without obstructing the flow of wort.
Sometimes, a fixed size hop spider is hard to fit all your brew kettles.
Okey, an adjustable hop spider is a good option.
Adjustable hop spider (Image Source: morebeer.com)
The adjustable hook is great for positioning the filter based on the size of your kettle and the volume of wort you’re boiling.
- Material: Opt for a hop spider made of high-quality and food-grade materials, such as stainless steel. Stainless steel is durable, easy to clean, and resistant to corrosion, making it a suitable choice for brewing applications.
- Mesh Size:The hop spiders available in the market typically come in a range of filtration ratings, with the most popular being a 400-micron mesh. However, there are also higher filtration rating options available, such as 300 and 200-micron mesh. These filters provide a high enough rating of filtration to keep the hops contained in one place. As mentioned in the previous section on the drawbacks of hop spiders, they can limit the release of hop oils and acids, affecting the overall flavor, especially with higher filtration rating hop spiders. An 800-micron mesh hop spider may help address some of these issues.With the largest mesh among all the spiders available on our list, this hop spider facilitates maximum wort flow and enhances hop utilization, making it ideal for hazy and hoppy beer styles. The coarser mesh means it works better with whole cone hops than hop pellets.

400-micron (Left) & 800-micron (Right)
- Design and Construction: Look for a hop spider with a well-constructed design that allows for easy addition and removal of hops. Consider features like a sturdy frame, a secure closure mechanism, and a handle or hook for easy handling.
- Reviews and Recommendations: Read reviews from other brewers or seek recommendations from brewing communities to get insights into the performance and reliability of different hop spider brands or models. This can help you make an informed decision.
- Budget: Set a budget for your hop spider purchase. While it’s essential to invest in a quality hop spider, consider options within your budget range that meet your requirements.
By considering these factors, you can choose a hop spider that suits your brewing setup, enhances hop utilization, and simplifies the process of adding and removing hops during brewing.
Where to buy a Hop Spider?
You can buy a hop spider from various sources such as homebrew supply stores, online retailers, and directly from manufacturers. Some popular options include Amazon, MoreBeer, Adventures in Homebrewing, and FILTERMFRS™.
Special note: FILTERMFRS™ does not accept retail orders. FILTERMFRS™ is a professional stainless steel brewing filter manufacturer, with a minimum order quantity of 500 pieces for custom orders. Bulk purchasing offers prices much lower than retail, making it a great option for brand owners, distributors, wholesalers, or retailers.

Using a hop spider is a simple and effective way to keep your hops contained and prevent them from clogging up your brew kettle. Give it a try on your next brew day and enjoy a smoother, less frustrating brewing experience.
Happy brewing!
FAQ
Besides hop spider, what other tools can separate hops and wort?
Mesh Strainer, Hop Bag, Chore-Boy Copper Scrubber, Hop Stopper, Bazooka Screen, False Bottom.
References: 7 Ways to Filter Your Hops (homebrewacademy.com)
Should I Use a Hop Spider or Hop Bag?
A hop spider is generally considered better than a hop bag for its ability to provide better hop utilization and easier removal of hops from the wort.
